

Tutorial: Pre-create inquiries for iOS
Tutorial: Pre-create inquiries for iOS
The Persona iOS SDK lets you integrate identity verification directly into your native iOS app.
There are two ways to use the iOS SDK:
- Generate inquiries from an inquiry template (Minimal code required)
- Pre-create inquiries via API (More code required)
This guide walks you through the second method: pre-creating inquiries via API. This is the method we recommend you use in production.
You will:
- Create a backend server with an endpoint that:
- Creates inquiries with prefilled user data
- Checks for existing inquiries to avoid duplicates
- Enables the user to resume partially-completed inquiries by providing a session token
- Create an iOS app that:
- Retrieves an inquiry ID from the backend for the current user
- Displays the Persona verification flow using the inquiry ID
Production note
The sample code in this guide illustrates an approach that we recommend in production.
However, for demonstration purposes, the code itself is simplified and not production-ready. For example, it does not include:
- Authentication
- Fetching real user information from a database
- Error handling and retry logic
- Monitoring
Alternative: Generate inquiries from template
Pre-creating inquiries (the method shown in this guide) is recommended for production use. However, if you’re looking for the fastest way to test the iOS SDK, see the inquiry template approach.
Prerequisites
You’ll need:
- A Persona account with a Sandbox API key
- macOS with Xcode installed
- Python 3.7+ installed locally (for the backend server)
- This guide provides sample backend code in Python, but you can adapt it to any language.
- Basic SwiftUI knowledge
- This guide provides sample iOS code using SwiftUI, but you can adapt it to UIKit.
Before you start, you should:
- Understand what an inquiry is
- Sign into the Persona dashboard and switch into your Sandbox environment
Scenario
A user named Alexander Sample just joined your dog walking app as a dog walker. You want to verify his identity to ensure the safety of users on your service.
Alexander’s user ID in your app is “usr_ABC123”. During account signup in your app, he stated his birthdate is August 31, 1977.
Step 1: Create an inquiry template
Every inquiry is created from an inquiry template, which defines details like the specific verification logic and UI text and branding of that inquiry. You can think of inquiry templates as a mold that lets you create many inquiries.
Persona offers a suite of solutions that include preconfigured inquiry templates. In this tutorial, use the “KYC” solution to verify your dog walkers.
Follow these instructions to add the “KYC” solution to your Sandbox environment.
Step 2: Locate the inquiry template ID
Find the ID of the newly-created inquiry template.
In the Persona dashboard, navigate to Inquiries > Templates. Find the “KYC” template in the list of inquiry templates, and note the value in the ID field. The value should begin with itmpl_.
Step 3: Create the backend API
Create a backend server with one endpoint that returns an inquiry for the current logged-in user. If the user has an in-progress inquiry, the backend will return that inquiry’s ID. Otherwise, the backend will create a new inquiry and return its ID.
This is the same backend from the Embedded Flow Pre-create guide.
- Create a new directory for the backend:
- Create
server.pywith the following code:
In this code, replace itmpl_XXXXXXXXXXXXX with your inquiry template ID from Step 2.
- Create the
requirements.txtfile:
- Install required dependencies:
- Set your Persona Sandbox API key as an environment variable:
- Start the server:
You should see:
Keep this terminal window open.
About the backend code
The backend is identical to the Embedded Flow Pre-create guide. See that guide’s explanation for details on:
- Finding incomplete inquiries
- Resuming inquiries with session tokens
- Securely prefilling the inquiry with user data and providing a reference ID
iOS app architecture
In the next steps, you will construct the iOS app. Here’s how the pieces fit together:
View Model:
- OnboardingViewModel: Communicates with the backend API and manages state used by the views
Views:
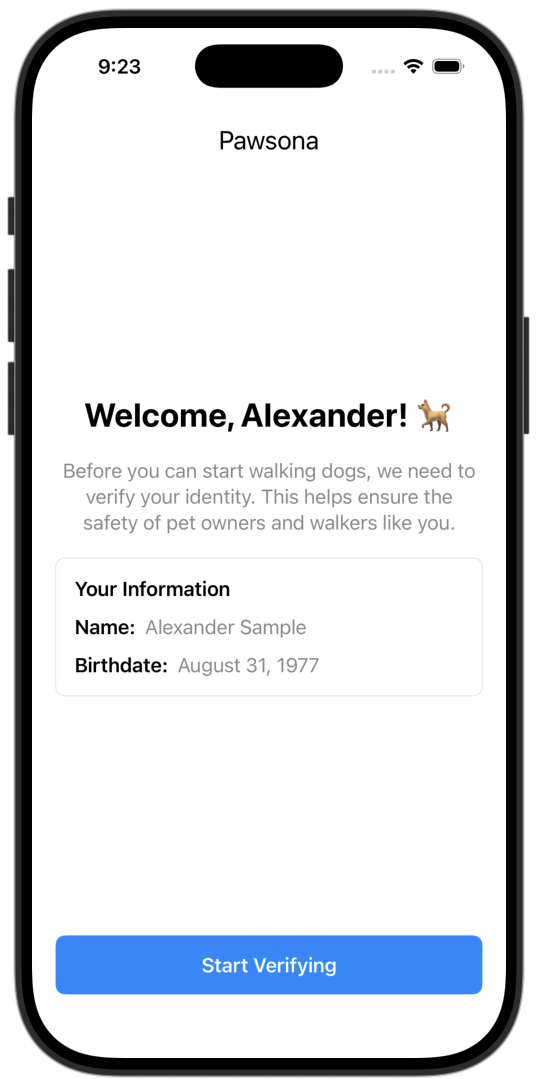
- OnboardingView: The step in Alexander’s user onboarding flow that shows a “Start Verifying” button
- PersonaFlowPresenter: View that wraps the Persona iOS SDK for use in SwiftUI. Is presented by OnboardingView.
- FinishedView: The screen shown to Alexander after he completes verification
- ContentView: View that provides simple logic to show OnboardingView versus FinishedView. Creates and owns the view model.
UX flow:
- Alexander taps “Start Verifying” in OnboardingView
- OnboardingViewModel calls backend API
- Backend returns inquiry ID (and session token if resuming pending inquiry)
- PersonaFlowPresenter presents Persona verification
- Alexander completes verification and sees FinishedView
Next, you’ll create the app and build the view model first, then the views.
Step 4: Create iOS app with Persona SDK
Create a new iOS app that will display the Persona verification flow.
-
Open Xcode and create a new iOS App project:
- Product Name:
Pawsona - Interface: SwiftUI
- Language: Swift
- Product Name:
-
Install the Persona iOS SDK using Swift Package Manager:
- In Xcode, go to File > Add Package Dependencies
- Enter the repository URL:
https://github.com/persona-id/inquiry-ios-2 - Select “Up to Next Major Version” with the current version of the SDK
- Click Add Package
Step 5: Create the view model
Create a new Swift file called OnboardingViewModel.swift:
About the view model
This view model handles the following tasks:
Fetching inquiry from backend: Your iOS app fetches an inquiry from your backend. This is the key part of the “Pre-create” approach:
Handling callbacks: The view model handles callbacks from the Persona SDK:
handleCompletion: Called when verification finishes successfullyhandleCancellation: Called when user cancels the flowhandleEvent: Called when the flow starts or progresses to a new pagehandleError: Called when an error occurs
These callbacks let you coordinate your app’s UI with changes in the Persona UI. Do not rely on them for up-to-date data about the state of the inquiry. Use webhooks (Step 11) for logic that depends on inquiry state.
Storing and updating state: The view model updates its state based on the Persona callbacks. This state is consumed by the views in our app:
Step 6: Create the onboarding screen
Now, create the onboarding screen that Alexander sees before he starts verification:
When you created the iOS app, a ContentView was generated. Replace the contents of ContentView.swift with the following code:
Then create OnboardingView.swift:
About OnboardingView
Note the following features of OnboardingView:
“Start Verifying” button: OnboardingView contains a “Start Verifying” button. When tapped, it triggers the view model to initiate the Persona verification flow:
Persona flow presentation: After the view model gets an inquiry from the backend, it sets showPersonaFlow to true. The Persona flow is then presented:
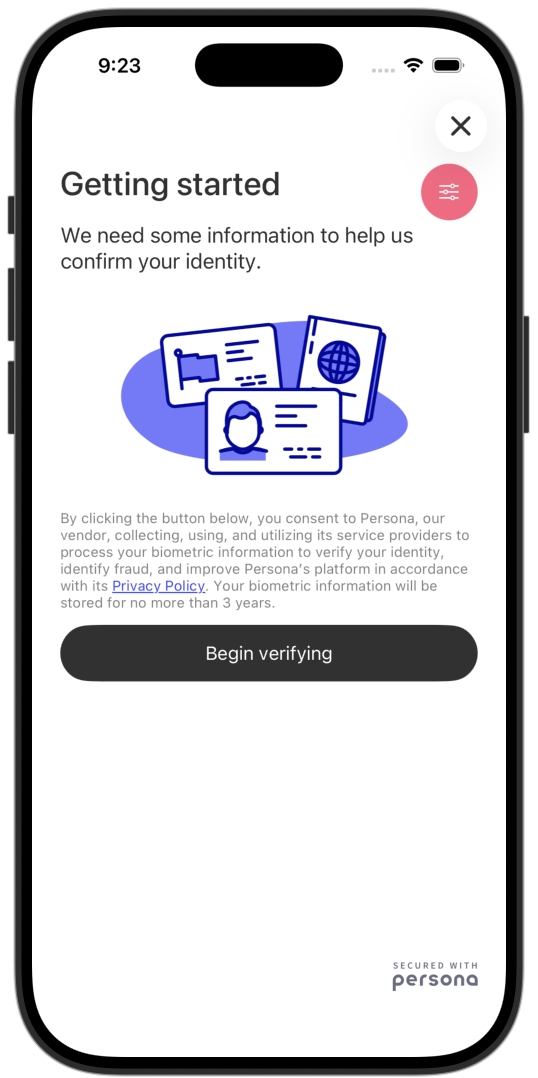
Step 7: Create the Persona flow wrapper
The Persona SDK provides the Inquiry class, which has a start method that starts the verification flow as a modal:
As you can see from the method above, the Inquiry needs to be presented from a UIKit UIViewController. In SwiftUI, we must wrap a UIViewController within a UIViewControllerRepresentable. You’ll create this now.
Create PersonaFlowPresenter.swift with the following code:
About the Persona flow wrapper
This wrapper integrates the Persona iOS SDK with SwiftUI. Note the following features:
Uses a pre-created inquiry: The SDK is initialized with inquiryId instead of a template ID. The session token is non-nil only when resuming pending inquiries:
Note that the code here doesn’t prefill user data or set a reference ID on the inquiry, because the backend already did that.
Implements an InquiryDelegate: The Persona SDK requires a delegate object that conforms to InquiryDelegate to receive completion, cancellation, event, and error callbacks. In PersonaFlowPresenter, the internal Coordinator class is this delegate:
Step 8: Create the finish screen
The final piece of iOS app code is the simple screen that’s shown after Alexander finishes the Persona verification:

Create a new Swift file called FinishedView.swift:
Step 9: Add required iOS permissions
The Persona SDK requires a few permissions you must prompt the user for.
-
In your app settings, go to Targets > Pawsona > Info.
-
Edit “Custom iOS Target Properties” to include the following settings:
- Camera permissions
- Key: “Privacy - Camera Usage Description”
- Value: “This app needs access to your camera to enable you to verify your identity.”
- Location permissions
- Key: “Privacy - Location When In Use Usage Description”
- Value: “This app may need access to your location to enable you to verify your identity.”
- Camera permissions
Step 10: Configure the iOS app for your computer
There are a few settings needed in this demo app. These settings are NOT needed for a production app.
-
Allow your iOS app to talk to your local backend. In the “Custom iOS Target Properties” (which you edited in the previous step), add the following setting:
- Key: “App Transport Security Settings” (Dictionary)
- Add Child: “Allows Local Networking - Local Networking Exception Usage”
-
If you’re testing on a physical device (e.g. a real iPhone), you need to update the backend URL:
-
Find your computer’s IP address:
- On macOS: System Settings > Network > Wi-Fi > Details > TCP/IP
- Look for “IP Address” (e.g.,
192.168.1.100)
-
In
OnboardingViewModel.swift, update thebackendURL:
Make sure your iPhone and computer are on the same Wi-Fi network.
-
Step 11: Set up a webhook (optional)
You can receive notifications when any inquiry’s state changes. For example, you can be alerted when any inquiry is started by a user, or when any inquiry is completed. See the full list of inquiry events you can be alerted about.
To receive automatic notifications:
- Create a webhook endpoint (for a sample server, see Webhook quickstart)
- In the dashboard, navigate to Webhooks > Webhooks.
- Add your endpoint URL
- Select the following “Enabled events”:
inquiry.started,inquiry.completed,inquiry.approved,inquiry.declined, andinquiry.failed
For this tutorial, you can skip webhooks and view results in the dashboard.
Step 12: Test the complete flow
Build and run the app in Xcode. Then test the inquiry creation and resumption logic with different scenarios. When doing these manual tests:
- Do not enter real personal information, since this is Sandbox.
- Keep the “Pass verification” setting selected (set via the pink config menu on screen) to simulate passing all the checks.
Scenario 1: Create new inquiry
- Click “Start Verifying”
- Wait for the Persona modal to open
- Check backend logs for:
No incomplete inquiry found, creating new one - Close the modal without entering any information
Scenario 2: Resume created inquiry
- Restart the app
- Click “Start Verifying”
- Check backend logs for:
Found existing inquiry inq_XXXXXXXXXXXXX with status: createdInquiry is created, resuming without session token
- Complete the government ID verification step
- Stop before completing the selfie verification
- Close the modal
Scenario 3: Resume pending inquiry
- Restart the app
- Click “Start Verifying”
- Check backend logs for:
Found existing inquiry inq_XXXXXXXXXXXXX with status: pendingInquiry is pending, generating session token to resume
- Check that the Persona modal starts at the selfie verification step (government ID already completed)
- Complete the selfie verification
Scenario 4: Create new inquiry after completion
- Restart the app
- Click “Start Verifying”
- Check backend logs for:
No incomplete inquiry found, creating new one - Check that the Persona modal shows a new inquiry
- Do not complete this inquiry
Step 13: (optional) Inspect webhook events
If you set up the webhook in Step 11, check your server logs. You should see events from inquiry.started, inquiry.completed, and inquiry.approved.
Note: If you want to receive the inquiry.failed event, open the verification flow again and select “Fail verification” in the debug menu (the pink config menu on screen). Then click through the verification flow.
Step 14: View inquiry results
In the Persona dashboard:
- Navigate to Inquiries > All Inquiries
- Find Alexander’s inquiries (search by reference ID
usr_ABC123)
You should see two inquiries if you tested all four scenarios above. Click on each to see their status and details. Note that because this inquiry was created in Sandbox, some of the data shown will be demo data.
You can also retrieve inquiry details via API. You’ll need the inquiry ID you see printed in the “Debug info” section of the UI. See Retrieve an Inquiry.
Summary
You have built a backend API that:
- Pre-creates inquiries securely on the backend
- Prevents duplicate inquiries by checking for incomplete ones
- Enables inquiries to be resumed with session tokens
- Prefills user data securely on the backend
You also:
- Built an iOS app that receives inquiry IDs from your backend and presents the Persona flow
- Tested a whole inquiry lifecycle (create → resume → complete)
This is a complete example of how you can pre-create inquiries for a verification flow created with the Persona iOS SDK.
Next steps
Enhance this integration:
- Full iOS SDK guide
- Set up webhooks with best practices for production
- Handle inquiry expiration for inquiries not completed in time
Explore further: